
http://quietbook.blogspot.com/
 I received a nice comment on this blog last month from Jaclyn who writes sweetmamaduck and she shared with me a link
to her beautiful quiet book that she recently put together. She has
actually made 2 quiet books- one for her son and one for her niece (such
a nice Aunt huh- you know what I mean if you've made a quiet book
before- they take a lot of sweat and tears to create!).
I received a nice comment on this blog last month from Jaclyn who writes sweetmamaduck and she shared with me a link
to her beautiful quiet book that she recently put together. She has
actually made 2 quiet books- one for her son and one for her niece (such
a nice Aunt huh- you know what I mean if you've made a quiet book
before- they take a lot of sweat and tears to create!).
I wanted to share with you all her cute ideas and pages.
It's hard to choose, but I think my favorites are...
The washing machine/getting dressed pages (look at that cute clothesline and the washer window!):
 The fridge with magnets:
 And look how clever this is, the fridge opens up and you can fix yourself a sandwich!:

 Look at how fun this part of her road/car page is complete with a carwash and gas pump:
 I love this little deer/strawberry page:
 I think my favorite thing about it is the cute little owl in the tree!:
 And I love her cover. What precious fabric!:

Jaclyn also has a great pinterest board that you all need to go check out where she has a great collection of cute quiet book pages found across the Internet.

Thanks Jaclyn for sharing!

Amongst all the other treasures Vanessa makes on her blog, she also has made her own rendition of quiet books, called "texture books".


blogspot.com/2011/09/niesiona-
wena-popeniam-kolejna.html
QUIET BOOK 1#
http://marta-mojepasje.
blogspot.com/2011/08/quiet-
I believe that my "pages" will inspire others to be creative :) (Oh yes they will Marta!)
Keep worm + hugs _ m@rta http://marta-mojepasje.
blogspot.com
Please make sure you go and visit Marta's blog. It's so colorful and beautiful and I'm loving the Polish sewin' style of her Quiet Books. Here's a few of my favorites of her pages:


 I
want to hear from all you quiet book makers! Do you have a particular
page you created in your quiet book that you are extra proud of and
wouldn't mind sharing with the world how you made it? If so, I want to
feature you and your page here!
I
want to hear from all you quiet book makers! Do you have a particular
page you created in your quiet book that you are extra proud of and
wouldn't mind sharing with the world how you made it? If so, I want to
feature you and your page here!
Please email me at fowlerfam at gmail dot com with your page and instructions (templates/pictures included) and I will feature you and your page right here and link back to you (if you'd like).
I created this blog about 4 years ago because there really wasn't much at all in terms of quiet book instructions and ideas on the internet. Now, there are so many great ideas out there! And I'd love to feature them here!
Also if anyone has done a quiet book group (where a group of you have gotten together and done a swap with pages), I'd love to hear from you as well and feature your guidelines/ideas here! Just shoot me an email at the above address. -Anna
 For
some reason, my blog button stopped working (it's the little button on
the right sidebar that you can "sew" on to your own blog to share with
others that you are making a quiet book). I'm terribly sorry!
For
some reason, my blog button stopped working (it's the little button on
the right sidebar that you can "sew" on to your own blog to share with
others that you are making a quiet book). I'm terribly sorry!
I got it up and running again. If you sewed on a button in the past and it is coming up as a black screen right now, you will have to re-sew it on. Just follow the instructions I have posted below the button (click highlight and then right click copy), then in your blog page elements page, click add a new gadget, select html code and then just right click paste the code you just copied. That should work!
Thanks to all of you that have shared this blog with others by sewing on a button to your blog!
 I'll
be honest, I made this shoe page 4 years ago, and since then, have
seen MUCH CUTER shoes out there on people's blogs. I'll provide
instructions on how to make mine, but I'll also provide some links to
even trendier shoe pages down below;)
I'll
be honest, I made this shoe page 4 years ago, and since then, have
seen MUCH CUTER shoes out there on people's blogs. I'll provide
instructions on how to make mine, but I'll also provide some links to
even trendier shoe pages down below;)

This shoe page is yet another page I copied from my mom's old school quiet book page. There was a page with an old vinyl red shoe I remember as a kid practicing my tying skills on. Here's the template my mom made years ago:
 One
thing my mom recommended when I was making my own quiet book 4 years
ago, was to make things out of fun, imaginative material. Throughout
your quiet book you will want to have different textures of material. I
know felt is what a lot of the book is made out of, but take advantage
of the shoe page to use a different, new sort of material. You might
try corduroy (like mine), or vinyl (like my mom's), or leather (if you
are posh), or some sort of fuzzy material.
One
thing my mom recommended when I was making my own quiet book 4 years
ago, was to make things out of fun, imaginative material. Throughout
your quiet book you will want to have different textures of material. I
know felt is what a lot of the book is made out of, but take advantage
of the shoe page to use a different, new sort of material. You might
try corduroy (like mine), or vinyl (like my mom's), or leather (if you
are posh), or some sort of fuzzy material.
Items Needed: a piece of 7" x 10" in the material you want your shoe and shoe tongue out of. 8 eyelets (for 2 rows of 4), 1 shoelace (make sure it can easily fit through your eyelets, and a shorter size shoelace generally works better- or you can trim it down, although those plastic thingies on the end of a pre-cut one sure come in handy when you are threading the lace through the eyelets).
Teaches: how to tie your shoe! Also teaches lacing, tying a bow or knot.
Cut out the following pieces: (tip: I used pinking shears when cutting out my shoe material- since corduroy frays). Cut out a shoe and shoe tongue from the template pieces (only cut on the blue lines- the dotted lines are for top stitches you'll add later. If you want the shoe to have two different textures (like a white leather toe), then cut out a piece of the other material from the dotted top stitch line (be a little generous when cutting so you have room to sew them together). After you cut out the shoe shape, be sure to cut out the inside part and cut the line that goes up the front of the shoe on the lacing part.
Directions: First you are going to want to top stitch around the opening of the shoe and up the line under the laces. Then, add your eyelets. I have an eyelet tool which works great and is fast and easy for this. You then are going to want to add a top stitch that can secure the shoe tongue in place. Place the tongue piece under the shoe material/lacing slit so that it protrudes a bit out of the bottom, and then sew a stitch out from the left side of the shoe, over to the 3rd lacing hole, up around the lacing portion and shoe tongue top, and then down the right side to the 3rd lacing hole and out to the right edge of the shoe.
Next you are going to want to sew your shoe onto your quiet book page. Center it (and you might want to add a word blog with the text "Tie my shoe!" or "Can you tie me?" or something above it). And then sew it into place. Be sure to only sew around the outside of the shoe (you don't need to sew on the inside or around the hole). This will make it kind of fun too as your child can stick their hand inside the shoe (or even try their own foot! I remember trying that as a kid).
Last step- lace the shoe and tie a bow!
Here are links to really cute shoe pages for more ideas:
Thornock's do 2 shoes
My little sister's
 Naptime Journal does a lacing football rendition
Crafty Chic lyric
Andrea's Original's (with template)

Leafy Tree top's page and template

For a football lacing rendition template, visit Jodell's template
 *Sorry- for the hiatus in posting- I had a new baby and moved across the country!*
This is a page I copied from my mom's original quiet book. Here's some other links to cute numbers pages in other quiet books: Homemade by Jill's 1-4 (I love how her numbers have that cute stitching on them!), or a different approach to counting with objects with Sew can do's rendition with objects, and lastly my little sister, Sara Jean, made a really cute numbers page complete with a place to do MATH (her husband is into numbers, so this is perfect for their kids).
Items needed: felt in various colors for the numbers, felt or material to make a pocket to place numbers in, velcro pieces (I used 14 teeny squares, cut from a strip to make mine), thread.
Teaches: numbers 1-10, matching, color recognition, working with velcro.
Cut out the following pieces: cut out each number 3 times (1 for applying to the page, 2 for sewing together and becoming the removable number pieces). My numbers are roughly 3" tall. You are going to want to originally cut out the numbers a bit larger than the final product, as you will trim them down a bit after doing some sewing. You can also use the template below if you'd like:
 Then
cut out the velcro in square/rectangle shapes (if you are using velcro
from a strip). I used 1 square piece of velcro on most numbers, except
for the 2, 5, 0 (on the 10), where I used 2 pieces on the number.
Then
cut out the velcro in square/rectangle shapes (if you are using velcro
from a strip). I used 1 square piece of velcro on most numbers, except
for the 2, 5, 0 (on the 10), where I used 2 pieces on the number.
Then cut out the pocket pieces. I used pinking shears on my bottom rectangle and on the bottom lid part of the upper rectangle so it wouldn't fray/be extra sturdy. My rectangle pieces for the pocket measure: 7.45" x 1.25" (pocket lid), and 7.45" x 3.5" (pocket bottom).
Directions: First you are going to want to sew the velcro to the numbers pieces. First apply the soft velcro piece to the backside of just one of the copies of numbers you just cut (so for instance, you should have three number 4's cut, just take one of these number 4's, flip it over, so you are looking at the number backwards- and from the backside, sew the velcro piece on). The picture below shows the number already sewn to the page (I took pictures after the page was finished), but at this point you are going to just be sewing the velcro onto just the number (not the muslin too). Sew the corresponding "prickly" piece of velcro to the number 4 piece
that will be applied to the muslin page- this time sewing on the velcro
to the right side of the number four. Be sure to sew the velcro onto
these pieces so it matches up to the velcro sewn onto the number pieces.
(Number 1 piece shown below- once again, this picture was taken after
the page was finished- at this point, you will just be sewing the velcro
to a single number (not 2 numbers sewn together).
Sew the corresponding "prickly" piece of velcro to the number 4 piece
that will be applied to the muslin page- this time sewing on the velcro
to the right side of the number four. Be sure to sew the velcro onto
these pieces so it matches up to the velcro sewn onto the number pieces.
(Number 1 piece shown below- once again, this picture was taken after
the page was finished- at this point, you will just be sewing the velcro
to a single number (not 2 numbers sewn together). One
thing to take note when applying the velcro and even cutting the velcro
rectangles, is you will eventually be trimming down these numbers just a
tad, so don't have the velcro go all the way out to the edges.
One
thing to take note when applying the velcro and even cutting the velcro
rectangles, is you will eventually be trimming down these numbers just a
tad, so don't have the velcro go all the way out to the edges.
 don't mind my messy stitching above :)
Next,
you are going to want to make your number pieces (the removable piece)
double thick. Do this by taking the number copy that has the soft
velcro attached to the backside and the number copy with no velcro
attached and pin them together. Sew these 2 pieces together by
stitching around the edges. Once you've stitched them together, take a
pair of scissors, and trim around the edges so that the stitch you just
made is near the edge.
don't mind my messy stitching above :)
Next,
you are going to want to make your number pieces (the removable piece)
double thick. Do this by taking the number copy that has the soft
velcro attached to the backside and the number copy with no velcro
attached and pin them together. Sew these 2 pieces together by
stitching around the edges. Once you've stitched them together, take a
pair of scissors, and trim around the edges so that the stitch you just
made is near the edge.  Pick up the left over number copy (the one with the prickly velcro on
the right side), and and hold it up against the number piece you just
made and trim it down so it matches in size.
Pick up the left over number copy (the one with the prickly velcro on
the right side), and and hold it up against the number piece you just
made and trim it down so it matches in size.
Next, place each "left-over" number copy on the muslin pages (I spread mine out over 2 pages), so you can get a feel for their placement on the page. On my page, the left page is numbers 1-6, and the right page is number 7-10 and then a pocket below those 7-10 numbers. You will also want to place the pocket pieces in place on the page before you sew the numbers on to make sure it all fits. Remember that you will be sewing the muslin page together to another muslin page in the end, so be sure to leave enough edge around the border.

Once things are in place, sew the single thickness numbers on the muslin page (don't sew the double thickness number pieces on- those will attach with velcro!) right side up, so the velcro shows. Then just velcro the numbers onto the page into place. Then sew on the pocket- mine is really simple. I just first sewed the pocket bottom on (just sewing around the left and right edges and bottom (leaving the top open), and then sewing on the pocket lid (placing the lid so it's lip goes over the pocket bottom slightly) by just stitching on the left and right side and top (not the bottom). There you have it- a numbers page. Get counting!
*Next up- Tie the shoe page, and then we're done!
 This
is a page I came up with after wanting to do a buckle, and also wanting
to be able to teach my kids how to set the table correctly (this is
something I'm ashamed to admit, but as a mom I sometimes still do
wrong!). Other great buckle page ideas can be found here (from little handsbigwork.blogspot.com), and here (this is my little sister's book, scroll down to the super man buckle), and here (scroll down to the sixth picture down).
This
is a page I came up with after wanting to do a buckle, and also wanting
to be able to teach my kids how to set the table correctly (this is
something I'm ashamed to admit, but as a mom I sometimes still do
wrong!). Other great buckle page ideas can be found here (from little handsbigwork.blogspot.com), and here (this is my little sister's book, scroll down to the super man buckle), and here (scroll down to the sixth picture down).
Here's my attempt at providing a template. It is all drawn to scale on a 8.5" x 11" sheet of paper, so if you are able to print it out at 100%, the sizes should be about right. The only thing not listed on the template is the napkin, which is pretty self explanitory- basically just a square folded up into a triangle.

Items needed: One small buckle (I got mine at Joann's. They have a variety of shapes/sizes/in metal or plastic- look at all these fun buckles), about 8" x 12" rectangle of material for placemat and napkin (I picked a red gingham that would fray at the edges to give it a picnic feel), 6 small velcro pieces (I cut mine down from one large piece), brown felt for the basket, 5" x 5" square of white pellon for place settings, 5" x 5" square of white felt for backing on place settings, 4 eyelets, brown and/or white thread for sewing.
Teaches: buckling/unbuckling, how to set a table, imaginative play.
Cut out the following pieces: from you large rectangle of material, you are going to want to cut 2 pieces- one large 7.5" x 7.5" square for the napkin, and one large 7.5" x 4.25" rectangle for the placemat. Cut your velcro pieces down to size later (they'll need to match the corresponding place setting). Cut your brown felt into the following 6 picnic basket pieces: basket body (mine is about 5" wide, 3" tall, and sort of rounded on the edges), basket lid (cut it like a long oval that will cover the basket pocket- mine is 5" wide, 1.5" tall, basket handle (cut it so that it is a wide upside down U-shaped piece- mine is 4.5" wide, and 1" tall), eyelet strip (cut out a long rectangle strip- with one end cut evenly, and the other en cut to a point- my strip is .75" wide x 3.5" long), buckle strip (this is the piece that will attach/fold over onto to the buckle- mine is 1.75" wide x 3" long), belt loop (this is a small piece that folds around the buckle strip and is like a belt loop and will fold around your buckle strip and hold your eyelet strip into place when all buckled- mine is .5" tall x 2" wide). Cut out your 5 place settings: Plate, fork , spoon, knife, cup, from the white pellon (I first drew them out with a black sharpie on the white pellon before cutting, and arranged them on the place mat to make sure they fit properly), and cut out identical pieces from the white felt. To give you a general idea, my plate is about 2.75" wide in diameter, and my utensils are about 3" tall. I ended up trimming my place settings down after sewing them the double thickness, so at this point, while doing the initial cutting, you might want cut them out generously and leave some room on the borders beyond the black marker so your stitching won't get too close to the edge.
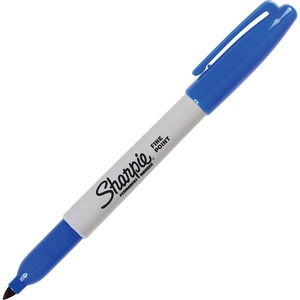
Directions: First, let's make those places settings (plate, fork, knife, spoon, glass). I used sharpie pens to draw out mine. I used an ultra fine black sharpie (permanent marker) for drawing the utensils and then used a colored blue sharpie
for coloring in the plate and water in the glass. Sharpies work great
on the pellon as they don't bleed. Before you sew the white pelon to
the white felt (to make the place settings double thickness), you are
going to want to sew on the velcro to the white felt half. I used the
soft/non sticky 1/2 of the velcro for this (so the placesettings
wouldn't stick to the inside of the picnic basket) and just cut out
small, thin pieces of velcro to match the specific place setting (see
picture).
I used sharpie pens to draw out mine. I used an ultra fine black sharpie (permanent marker) for drawing the utensils and then used a colored blue sharpie
for coloring in the plate and water in the glass. Sharpies work great
on the pellon as they don't bleed. Before you sew the white pelon to
the white felt (to make the place settings double thickness), you are
going to want to sew on the velcro to the white felt half. I used the
soft/non sticky 1/2 of the velcro for this (so the placesettings
wouldn't stick to the inside of the picnic basket) and just cut out
small, thin pieces of velcro to match the specific place setting (see
picture).  Sew
those into place onto the white felt pieces, and then sew the white
pellon (drawn on) pieces to the felt/velcro pieces. After sewing those
together to make them a double thickness, trim the edges so that they
lie close to the stitch.
Sew
those into place onto the white felt pieces, and then sew the white
pellon (drawn on) pieces to the felt/velcro pieces. After sewing those
together to make them a double thickness, trim the edges so that they
lie close to the stitch.
 Now,
for the napkin. This is pretty simple, just take your 7.5" x 7.5"
square and fold over the edges and iron, and then stitch to provide a
finished edge on all 4 edges. Then, I folded my napkin into a quarter
(so it was triangle shaped), and sewed on a piece of velcro to it, so
that it would stick to the place mat too. Because I applied the velcro
to the napkin after folding it, it makes it so that you can't open the
napkin completely, but it stays in a nice little triangle this way and
makes it easy to use when setting the table. After applying the velcro
to the napkin, I folded the napkin one more time and ironed/starched it
(so it became a smaller triangle and fits nicely on the place mat).
Now,
for the napkin. This is pretty simple, just take your 7.5" x 7.5"
square and fold over the edges and iron, and then stitch to provide a
finished edge on all 4 edges. Then, I folded my napkin into a quarter
(so it was triangle shaped), and sewed on a piece of velcro to it, so
that it would stick to the place mat too. Because I applied the velcro
to the napkin after folding it, it makes it so that you can't open the
napkin completely, but it stays in a nice little triangle this way and
makes it easy to use when setting the table. After applying the velcro
to the napkin, I folded the napkin one more time and ironed/starched it
(so it became a smaller triangle and fits nicely on the place mat). For
the placemat, take the 7.5" x 4.25" rectangle and on the top and bottom
edges of the rectangle, and fold them over and top stitch on top. I
wanted to leave my side edges unfinished (frayed) to give it a picnic
look, so I didn't fold those edges over, but rather frayed them and then
top stitched where the fray meets the material so the fraying would
stop. Then you are going to want to apply your other 1/2 of the velcro
pieces to the place mat. Play around with the place settings and
napkins and find out where they fit best. Then pin the velcro pieces
into place and sew them to the place mat material.
For
the placemat, take the 7.5" x 4.25" rectangle and on the top and bottom
edges of the rectangle, and fold them over and top stitch on top. I
wanted to leave my side edges unfinished (frayed) to give it a picnic
look, so I didn't fold those edges over, but rather frayed them and then
top stitched where the fray meets the material so the fraying would
stop. Then you are going to want to apply your other 1/2 of the velcro
pieces to the place mat. Play around with the place settings and
napkins and find out where they fit best. Then pin the velcro pieces
into place and sew them to the place mat material.
 Now
you are ready to sew the place mat to the quiet book page. My place
mat takes up the top half of the page. You may want to sort of position
your basket on the bottom half, to make sure everything will fit okay
(make sure to leave edges for the borders!). Once you've sewn the place
mat on, you are ready to start working on the picnic basket!
Now
you are ready to sew the place mat to the quiet book page. My place
mat takes up the top half of the page. You may want to sort of position
your basket on the bottom half, to make sure everything will fit okay
(make sure to leave edges for the borders!). Once you've sewn the place
mat on, you are ready to start working on the picnic basket!
Now, to build this picnic basket! First thing you are going to want to do is place the brown cut felt pieces together at the bottom of the page to sort of build the basket. This will help you know where to position the first piece you are going to sew on- the basket body. Before you sew on the basket body to the muslin quiet book page, you are going to want to top stitch just the top edge of the basket body. Since you sew this on like a pocket, it is this top edge that will not be sewn onto the page and will be tugged on the most. Once you've top stitched that, lay the basket body onto the page, and sew down the sides and across the bottom so you make a pocket.
 Then
you are going to want to top stitch the bottom half of the wide ovaled
basket lid (since the top half will be sewn to the page it doesn't need
top stitching). Then place the basket lid over the basket body, so that
it's bottom rim comes down over the basket body about 1/3". Sew it
into place by just sewing the top half of it to the muslin quiet book
page. I for no particular reason (probably just ran out of one of the
colors or something), used 2 different colors of thread here. If you
look closely, you can see my white thread is the top stitching, and the
brown thread is where I sewed the pieces to the muslin quiet book page.
Then
you are going to want to top stitch the bottom half of the wide ovaled
basket lid (since the top half will be sewn to the page it doesn't need
top stitching). Then place the basket lid over the basket body, so that
it's bottom rim comes down over the basket body about 1/3". Sew it
into place by just sewing the top half of it to the muslin quiet book
page. I for no particular reason (probably just ran out of one of the
colors or something), used 2 different colors of thread here. If you
look closely, you can see my white thread is the top stitching, and the
brown thread is where I sewed the pieces to the muslin quiet book page. Next
you are going to want to sew your basket handle to the page. I just
placed it on top of the oval lid and stitched it twice back and forth
into place.
Next
you are going to want to sew your basket handle to the page. I just
placed it on top of the oval lid and stitched it twice back and forth
into place.
 Now
for the buckle. Take your eyelet strip piece of felt, and apply four
eyelets to it. On the pointed edge, I took a little bit of pellon (you
could use any sort of reinforcement material here) and sewed it to the
point so the point was sturdier (and would feed through the buckle
easier). Place the eyelet strip now so the straight (not pointed) edge
is in line with the top of the oval lid and sew that into place. I went
back and forth on the sewing machine here with this stitch so that it
was reinforced well to the felt/page since I knew it would get tugged
on.
Now
for the buckle. Take your eyelet strip piece of felt, and apply four
eyelets to it. On the pointed edge, I took a little bit of pellon (you
could use any sort of reinforcement material here) and sewed it to the
point so the point was sturdier (and would feed through the buckle
easier). Place the eyelet strip now so the straight (not pointed) edge
is in line with the top of the oval lid and sew that into place. I went
back and forth on the sewing machine here with this stitch so that it
was reinforced well to the felt/page since I knew it would get tugged
on.
Next, you are going to want to apply your buckle to the buckle strip of felt. In order to do this, I had to loop the top edge over the buckle by making a small hole for the buckle tongue (the pin-like piece that feeds through the eyelets when the buckle is fastened) and then sewing the loop tightly into place around the base of the buckle so it becomes part of the buckle strip. I also reinforced my stitching here. Then you are going to want to take your belt loop, fold it into a ring shape and stitch it together, so it stays in a ring/loop. Slide this loop over the buckle strip you just built. Then sew the buckle strip onto the muslin quiet book page by placing it so that it's bottom edge (the edge without the buckle) lies flat with the bottom edge of the basket body. Before sewing this piece into place, you may have to play around withe buckle a bit and make sure it lines up well/attaches well with the eyelet strip that hangs down.
Lastly, if you want to put a text box on the page like mine, take some pellon and with permanent markers right something cute like "unpack the picnic basket and set the table", "set up a picnic!" or "a tisket a tasket, can you unbuckle my basket?"
Happy picnicking!
And up next is the "Numbers Page", so stay tuned! We're almost done with the 24 pages!!!

my Mom's old red quiet book for the inspiration!

Click on the Pic! As you can see there are a lot more instructions to come! I am slowly getting step by step instructions up on each page. I hope you find these useful! If you do find the instructions and links on this blog handy, will you be sure to link back to us here? Happy Quiet Book Making!

Are you in to trading and bartering? I made a sweet deal with my friend Janette. She is a photographer and we needed new family pictures. She wanted a quiet book for her little boy, but didn't know how to make one. Ta da - the trade! We got family pics for free, she got a custom quiet book for free.
The adorable chocolate colored tree fabric for the cover is from Joann's. I made the actual pages on felt, and then hammered in grommets to attach the rings. This way, if she wants to make more pages she can add them in, or if both kiddos want to play with a page.

Here is the classic Noah's Ark page with a zipper pocket. Simple.

I had a lot of fun making the fish page. The end of the fishing rod (shoelace) has velcro so it can "catch" a fish. The boat opens at the top so you can put your catch of the day there. The apples button on the tree and fit in the basket.

Every boy needs a road page! The red, yellow and green light pieces have velcro and the car parks in the garage.

The barn page is so fun with opening doors and animal finger puppets. Janette got married in the Idaho Falls temple, so this page is perfect. Each of the squares and Angel Moroni detach, so you can rebuild the temple. The little buttons open the door and inside is a piece of vinyl above the felt so Janette can put in a wedding picture.

I love this peek-a-boo page, it's one of my son's favorites. If you pull back the mittens I stitched on a piece of vinyl with an opening at the top so Janette can slip in a family picture. And of course, a little pocket for paper, pens and treats.
Quiet books are so much fun to make! If you haven't seen mine yet or want detailed patterns click here.
onday, February 6, 2012
Mama Duck's quiet book

I wanted to share with you all her cute ideas and pages.
It's hard to choose, but I think my favorites are...
The washing machine/getting dressed pages (look at that cute clothesline and the washer window!):


Jaclyn also has a great pinterest board that you all need to go check out where she has a great collection of cute quiet book pages found across the Internet.

Thanks Jaclyn for sharing!

Saturday, November 19, 2011
A "months" quiet book
I got an email from "Kendra" recently and she shared a link to a quiet
book she had made that highlighted the months of the year. Look how
cute this book is:
 It goes through all the months of the year with each page themed as a particular month. See the book in its entirety here (all pictures on this post are linked from her blog).
My favorite month, is this month (November), the fuzzy turkey!:
 And my second favorite is the February Valentine's page:

 And look at this pretty April Easter basket and May flowers:
 Thanks for sharing Kendra!
If you have unique quiet book idea, you'd like to share, email me (fowlerfam at gmail dot com) and I'd love to feature you here on the quietbook blog!

My favorite month, is this month (November), the fuzzy turkey!:


If you have unique quiet book idea, you'd like to share, email me (fowlerfam at gmail dot com) and I'd love to feature you here on the quietbook blog!
Saturday, September 24, 2011
A "texture" quiet book

above picture taken from here
I received an email from Vanessa from Lellaboutique, who by the way has SUCH a cute crafting blog full of some fantastic ideas. Amongst all the other treasures Vanessa makes on her blog, she also has made her own rendition of quiet books, called "texture books".
above picture taken from here
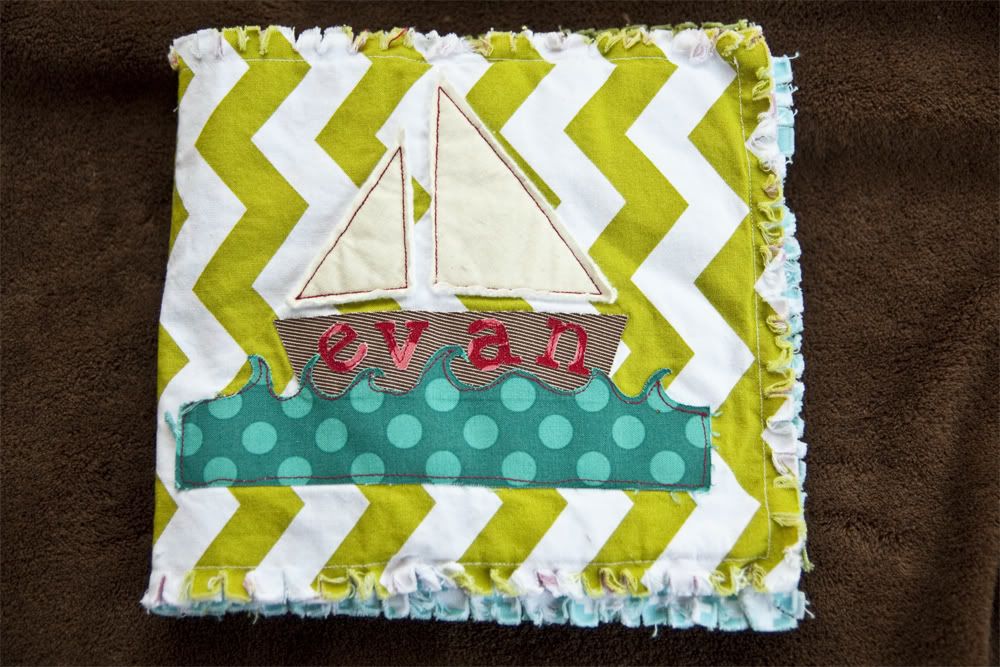
She has some adorable baby boy and baby girl "texture books" and was willing to let me link to them from here.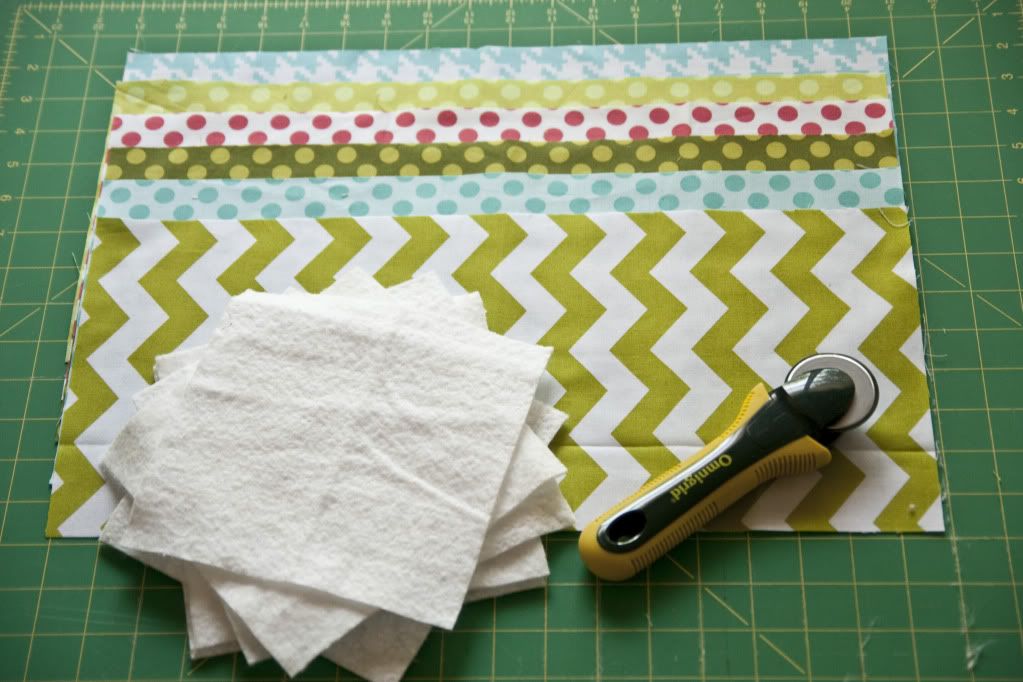
above picture taken from here
Vanessa's texture books are made from an array of colorful fabric and
have all sorts of textures for baby to roll their rolly-polly hands over
and full of fun familiar pictures for their little eyes to light up
over. 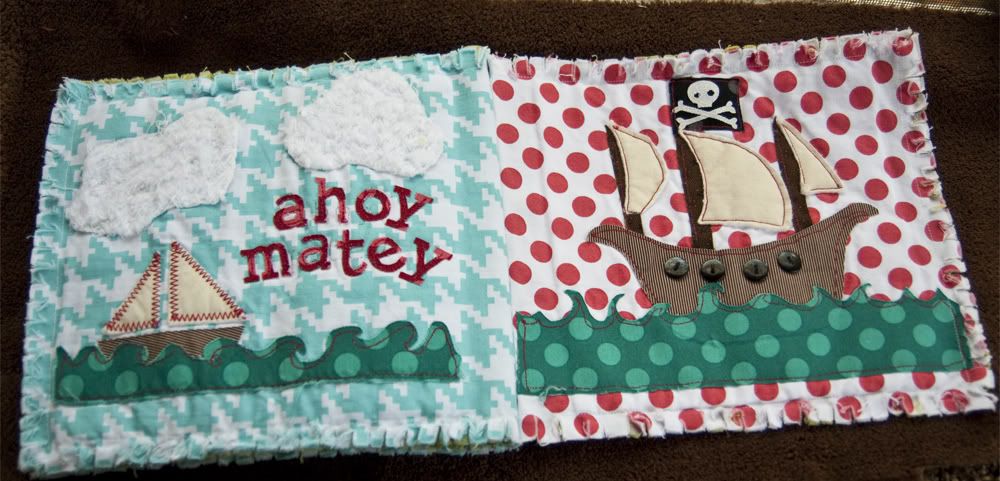
above picture taken from here
She gives a great tutorial on how to make the little boy book (which
you follow for the baby girl book too), and tells you all the supplies
you need to get.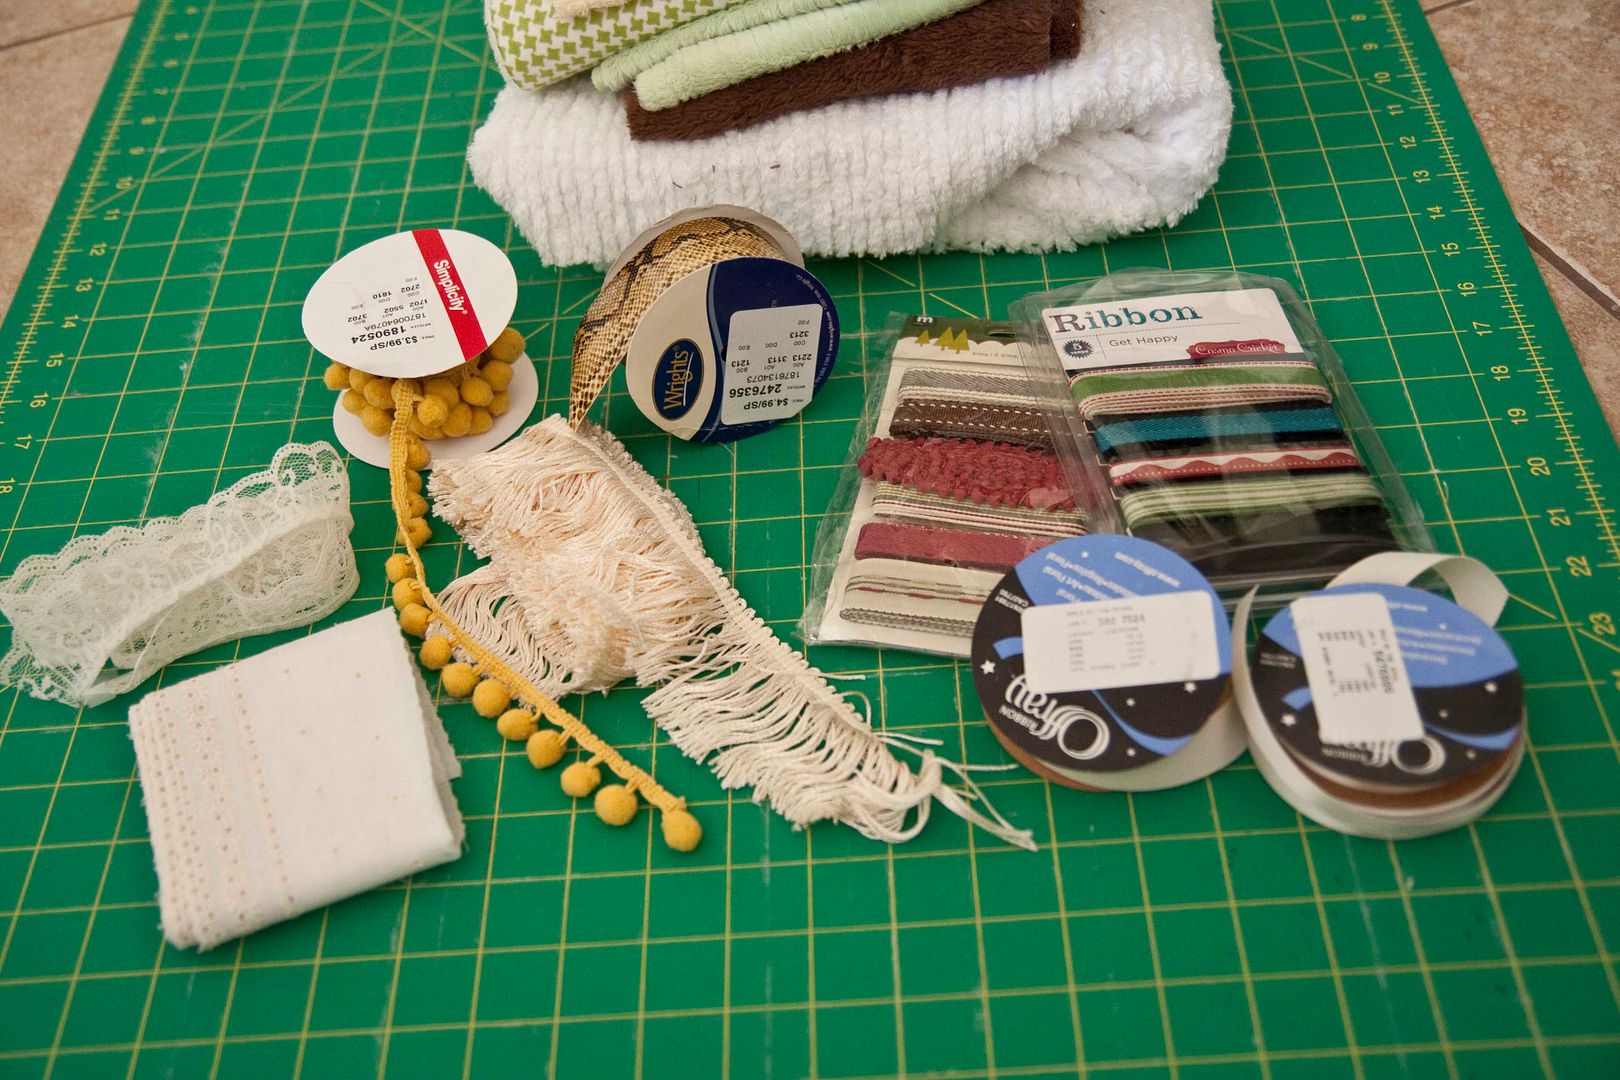
above picture from here
The instructions are easy to follow and full of pictures, so hop on over to her blog and give a baby "texture book" a try!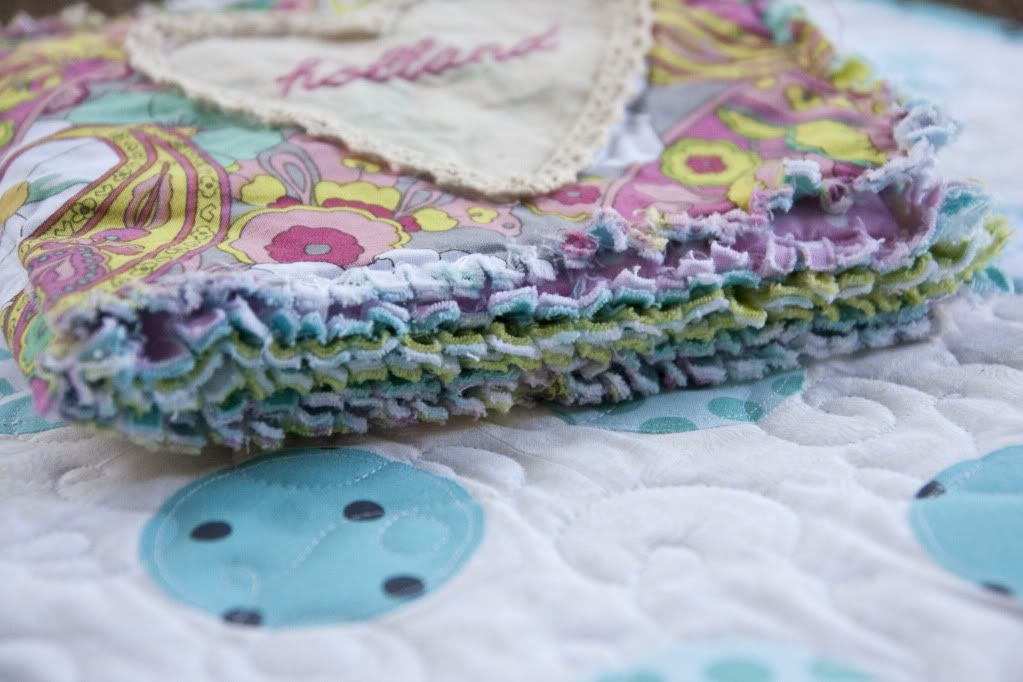
above picture from here
And don't you just love how she frayed the book's page edges? I think
my favorite baby boy page from her baby texture books is the dump truck
full of fuzzy soft brown dirt! So cute, yet manly for baby boy!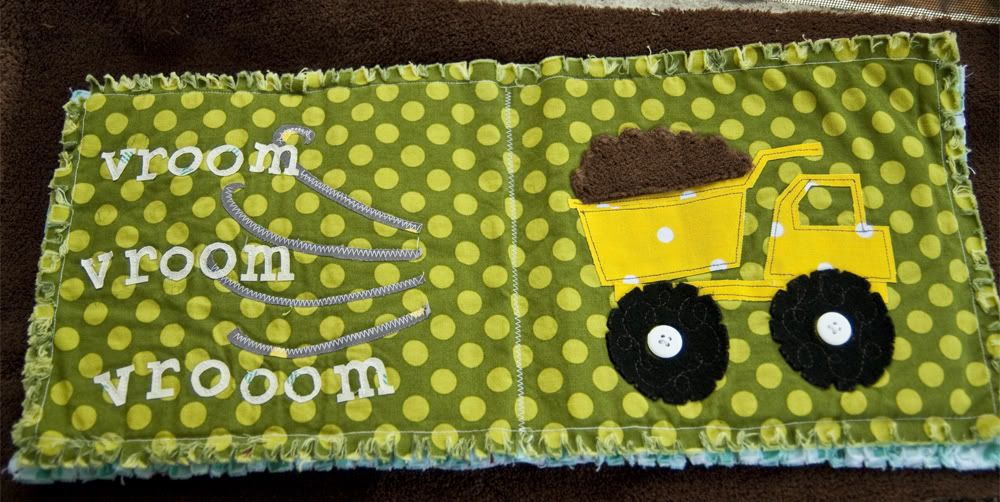
above picture taken from here
My favorite page from her baby girl texture book has got to be the sunflowers with pom poms and buzzing bee page.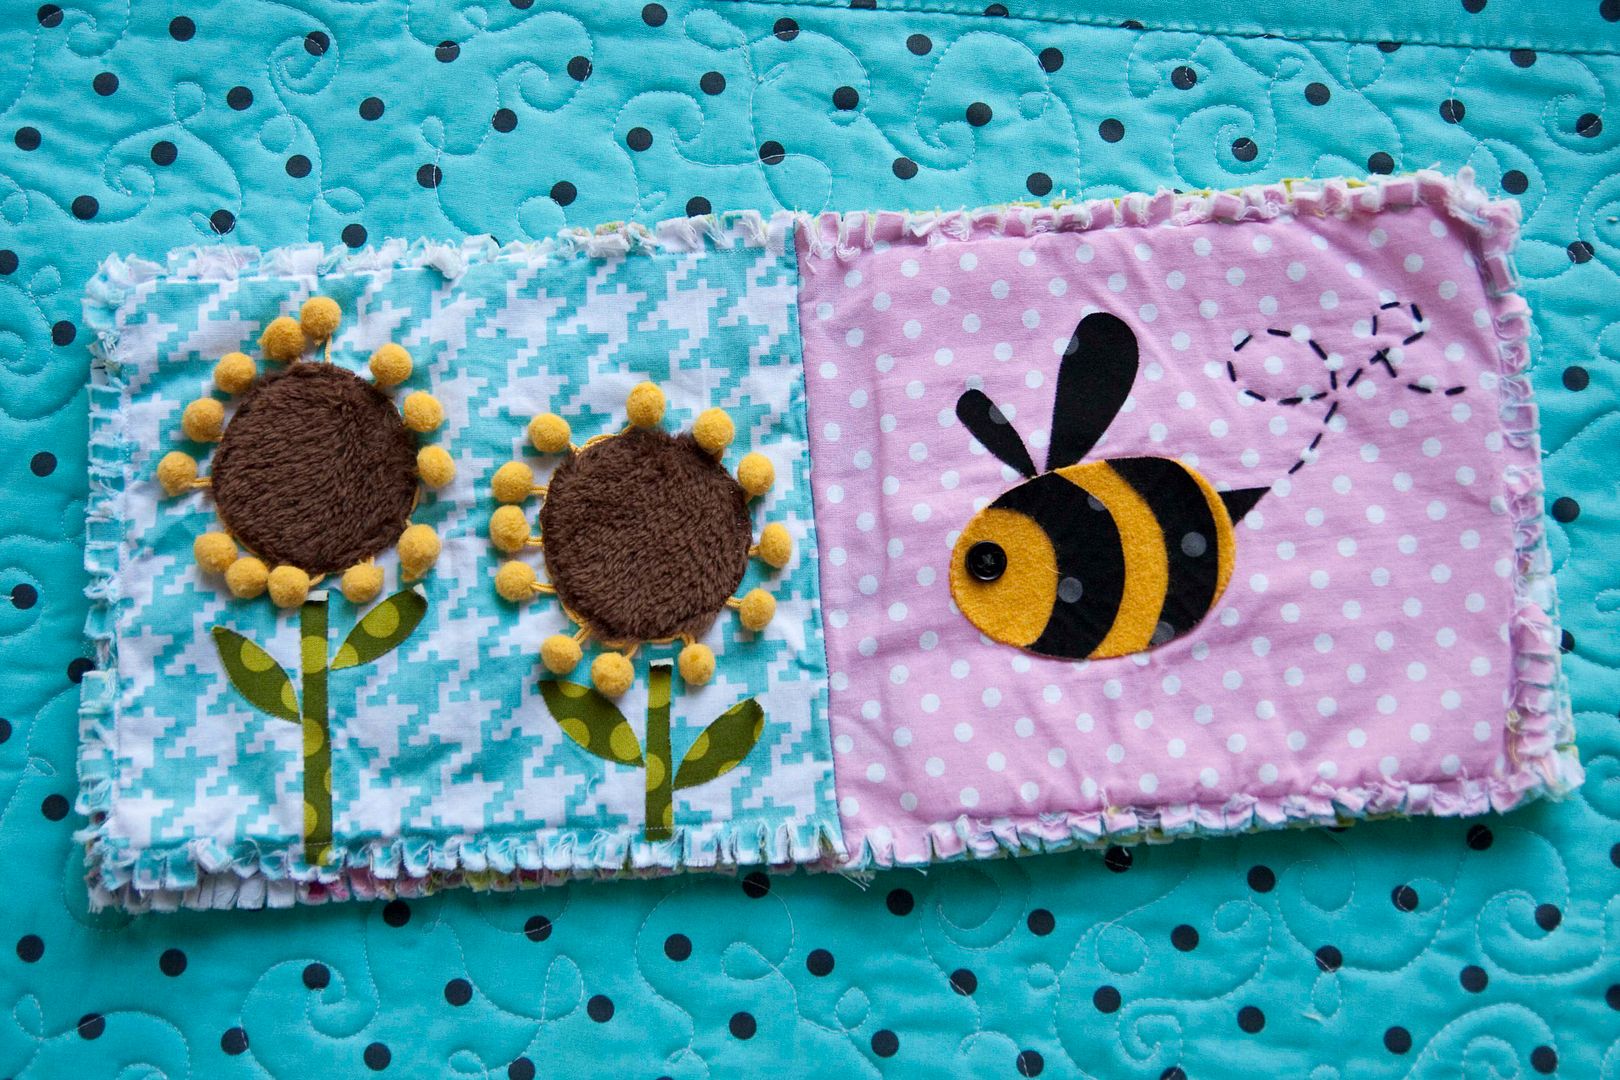
above picture from here
Thanks Vanessa for sharing!
Sunday, September 11, 2011
A Polish Quiet Book
I just love it when I hear from someone that has come across this blog
and found it helpful. It makes me happy when you share with me your
news about finally finishing your first quiet book, or how the pages
remind you of the quiet book you had when you were younger, or maybe you
have a question about a particular page.
Tonight I received one of those fun emails. From cute little "Marta" on the other side of the world in Poland. She wrote:
"Hello ! (Me: Hello back Marta!)
I've just finished my 2nd "quiet book" and I remember that U were interesting in collecting all bookmakers ideas :)
So, that's my link, which I would like to share with others:
QUIET BOOK 2#
http://marta-mojepasje.
Tonight I received one of those fun emails. From cute little "Marta" on the other side of the world in Poland. She wrote:
"Hello ! (Me: Hello back Marta!)
I've just finished my 2nd "quiet book" and I remember that U were interesting in collecting all bookmakers ideas :)
So, that's my link, which I would like to share with others:
QUIET BOOK 2#
http://marta-mojepasje.
wena-popeniam-kolejna.html
QUIET BOOK 1#
http://marta-mojepasje.
blogspot.com/2011/08/quiet-
I believe that my "pages" will inspire others to be creative :) (Oh yes they will Marta!)
Keep worm + hugs _ m@rta http://marta-mojepasje.
blogspot.com
Please make sure you go and visit Marta's blog. It's so colorful and beautiful and I'm loving the Polish sewin' style of her Quiet Books. Here's a few of my favorites of her pages:


Aren't those awesome? Or "niesamowite" according to google translate :)
Thank you Marta!
Saturday, August 27, 2011
Quiet Book GROUP
There is a lot of buzz on the web lately about Quiet Book Groups. It's a
social, fast, lower cost, and fun way of putting together a quiet
book. In essence, what it is, is you round up a group of other people
interested in making a quiet book. You decide on what pages you all
want to include, you divide up the pages, and then you swap. So lets
say if you had 12 people in your group, and you were each making a
different page, so that your quiet books in the end were 12 pages big (6
pages back to back). You then would make 12 copies of that page you
were in charge of. You could also do it with a smaller sized group and
then just be in charge of more than one page.
One of our readers here, Jacki, was wonderful and shared with me a link to her blog showing the wonderful collection of quiet book pages she made in a group. She also was willing to share her "instructions" for how to do it in a group which you can see below. She also shared some tips which are in italics. Thanks a ton Jacki for sharing your instructions, tips and insights!
Be sure to check out Jacki's blog and see her quiet book pages! My favorites of hers were these:
Girl hair braiding complete with hair bows!:
 A woman named Juli in Jacki's group made this delicious looking pie for the "weaving" page. Super cute eh?:
 Another person in her group, Erika, made a Mrs. Potato Head page, how fun!:
 And Look at this I-spy quilt puzzle Jacki made:
 Thanks so much for sharing Jacki!
Have YOU done a quiet book group? Do you have any tips or suggestions? Please feel free to leave any ideas or tips in the comments section! Or email a link to your blog and I'll highlight it here.
One of our readers here, Jacki, was wonderful and shared with me a link to her blog showing the wonderful collection of quiet book pages she made in a group. She also was willing to share her "instructions" for how to do it in a group which you can see below. She also shared some tips which are in italics. Thanks a ton Jacki for sharing your instructions, tips and insights!
Quiet Book Group Instructions
- Make 10 pages (they had a group of 10 women)
- Pages should be 10" x 12"
- Page should be created on home decor weight "target" material (Jacki mentioned that this ended up being a hard thing for a lot of the women in her group to find- and that in the future she'd recommend having one person buy a bolt of fabric and divide up the cost, as they ended up with different color and fabric backgrounds because the material varied from person to person).
- Pages are due August 1, 2011 (Jacki's group gave themselves 2 months, they had to extend because of vacations getting in the way)
- Leave 1/2" seam allowance around page edge to allow for binding (Jacki mentioned that this is a very important thing that many people forgot about and people let their page coverings/extra felt bleed out onto the edge, making it difficult to bind.)
- Make any detachable pieces sturdy and durable -- double felt with interface between, etc
- Only use sew-on velcro -- no sticker kind
- Make all pockets and openings out of hard felt or normal cotton fabric- felt pockets get stretched out easily
- Sew with thread that matches the applique color (no white thread on black felt)- so it looks more professional, and you can't see mistakes as easily!)
- Sew velcro so that the soft side is on the page (that way it won't stick to other pages when you close the book)
- Don't use glue
- This is supposed to be a fun project, so don't worry, we'll all still be friends regardless of how our pages turn out, right??!!
- Pages should be 10" x 12"
- Page should be created on home decor weight "target" material (Jacki mentioned that this ended up being a hard thing for a lot of the women in her group to find- and that in the future she'd recommend having one person buy a bolt of fabric and divide up the cost, as they ended up with different color and fabric backgrounds because the material varied from person to person).
- Pages are due August 1, 2011 (Jacki's group gave themselves 2 months, they had to extend because of vacations getting in the way)
- Leave 1/2" seam allowance around page edge to allow for binding (Jacki mentioned that this is a very important thing that many people forgot about and people let their page coverings/extra felt bleed out onto the edge, making it difficult to bind.)
- Make any detachable pieces sturdy and durable -- double felt with interface between, etc
- Only use sew-on velcro -- no sticker kind
- Make all pockets and openings out of hard felt or normal cotton fabric- felt pockets get stretched out easily
- Sew with thread that matches the applique color (no white thread on black felt)- so it looks more professional, and you can't see mistakes as easily!)
- Sew velcro so that the soft side is on the page (that way it won't stick to other pages when you close the book)
- Don't use glue
- This is supposed to be a fun project, so don't worry, we'll all still be friends regardless of how our pages turn out, right??!!
Be sure to check out Jacki's blog and see her quiet book pages! My favorites of hers were these:
Girl hair braiding complete with hair bows!:


Have YOU done a quiet book group? Do you have any tips or suggestions? Please feel free to leave any ideas or tips in the comments section! Or email a link to your blog and I'll highlight it here.
Sunday, August 7, 2011
Calling all quiet book makers!

Please email me at fowlerfam at gmail dot com with your page and instructions (templates/pictures included) and I will feature you and your page right here and link back to you (if you'd like).
I created this blog about 4 years ago because there really wasn't much at all in terms of quiet book instructions and ideas on the internet. Now, there are so many great ideas out there! And I'd love to feature them here!
Also if anyone has done a quiet book group (where a group of you have gotten together and done a swap with pages), I'd love to hear from you as well and feature your guidelines/ideas here! Just shoot me an email at the above address. -Anna
Button trouble!
For
some reason, my blog button stopped working (it's the little button on
the right sidebar that you can "sew" on to your own blog to share with
others that you are making a quiet book). I'm terribly sorry!I got it up and running again. If you sewed on a button in the past and it is coming up as a black screen right now, you will have to re-sew it on. Just follow the instructions I have posted below the button (click highlight and then right click copy), then in your blog page elements page, click add a new gadget, select html code and then just right click paste the code you just copied. That should work!
Thanks to all of you that have shared this blog with others by sewing on a button to your blog!
Wednesday, November 10, 2010
Page 24: Tie My Shoe

And this is the last page in the quiet book (24 pages back to back total!). I'm
going to try something new after this- I'll highlight different pages
of quiet books I've found to be really great (if you have one you think
is fabulous, and you want me to highlight, send me the link to:
fowlerfam at gmaildotcom). I'll also spend some posts on highlighting
tips and pictures of how to do a quietbook group (I had some friends do
this last year and I attended one of their swaps and took a bunch of
pictures). I'm also going to try and get templates up on each page. So
stay tuned!
First off, here's the template I've made for this page:

This shoe page is yet another page I copied from my mom's old school quiet book page. There was a page with an old vinyl red shoe I remember as a kid practicing my tying skills on. Here's the template my mom made years ago:

Items Needed: a piece of 7" x 10" in the material you want your shoe and shoe tongue out of. 8 eyelets (for 2 rows of 4), 1 shoelace (make sure it can easily fit through your eyelets, and a shorter size shoelace generally works better- or you can trim it down, although those plastic thingies on the end of a pre-cut one sure come in handy when you are threading the lace through the eyelets).
Teaches: how to tie your shoe! Also teaches lacing, tying a bow or knot.
Cut out the following pieces: (tip: I used pinking shears when cutting out my shoe material- since corduroy frays). Cut out a shoe and shoe tongue from the template pieces (only cut on the blue lines- the dotted lines are for top stitches you'll add later. If you want the shoe to have two different textures (like a white leather toe), then cut out a piece of the other material from the dotted top stitch line (be a little generous when cutting so you have room to sew them together). After you cut out the shoe shape, be sure to cut out the inside part and cut the line that goes up the front of the shoe on the lacing part.
Directions: First you are going to want to top stitch around the opening of the shoe and up the line under the laces. Then, add your eyelets. I have an eyelet tool which works great and is fast and easy for this. You then are going to want to add a top stitch that can secure the shoe tongue in place. Place the tongue piece under the shoe material/lacing slit so that it protrudes a bit out of the bottom, and then sew a stitch out from the left side of the shoe, over to the 3rd lacing hole, up around the lacing portion and shoe tongue top, and then down the right side to the 3rd lacing hole and out to the right edge of the shoe.
Next you are going to want to sew your shoe onto your quiet book page. Center it (and you might want to add a word blog with the text "Tie my shoe!" or "Can you tie me?" or something above it). And then sew it into place. Be sure to only sew around the outside of the shoe (you don't need to sew on the inside or around the hole). This will make it kind of fun too as your child can stick their hand inside the shoe (or even try their own foot! I remember trying that as a kid).
Last step- lace the shoe and tie a bow!
Here are links to really cute shoe pages for more ideas:
Thornock's do 2 shoes
My little sister's
Crafty Chic lyric
Andrea's Original's (with template)

Leafy Tree top's page and template

For a football lacing rendition template, visit Jodell's template
Friday, August 6, 2010
Page 22 & 23: Counting 1-10
 *Sorry- for the hiatus in posting- I had a new baby and moved across the country!*
 This is a page I copied from my mom's original quiet book. Here's some other links to cute numbers pages in other quiet books: Homemade by Jill's 1-4 (I love how her numbers have that cute stitching on them!), or a different approach to counting with objects with Sew can do's rendition with objects, and lastly my little sister, Sara Jean, made a really cute numbers page complete with a place to do MATH (her husband is into numbers, so this is perfect for their kids).
Items needed: felt in various colors for the numbers, felt or material to make a pocket to place numbers in, velcro pieces (I used 14 teeny squares, cut from a strip to make mine), thread.
Teaches: numbers 1-10, matching, color recognition, working with velcro.
Cut out the following pieces: cut out each number 3 times (1 for applying to the page, 2 for sewing together and becoming the removable number pieces). My numbers are roughly 3" tall. You are going to want to originally cut out the numbers a bit larger than the final product, as you will trim them down a bit after doing some sewing. You can also use the template below if you'd like:
 Then
cut out the velcro in square/rectangle shapes (if you are using velcro
from a strip). I used 1 square piece of velcro on most numbers, except
for the 2, 5, 0 (on the 10), where I used 2 pieces on the number.
Then
cut out the velcro in square/rectangle shapes (if you are using velcro
from a strip). I used 1 square piece of velcro on most numbers, except
for the 2, 5, 0 (on the 10), where I used 2 pieces on the number.Then cut out the pocket pieces. I used pinking shears on my bottom rectangle and on the bottom lid part of the upper rectangle so it wouldn't fray/be extra sturdy. My rectangle pieces for the pocket measure: 7.45" x 1.25" (pocket lid), and 7.45" x 3.5" (pocket bottom).
Directions: First you are going to want to sew the velcro to the numbers pieces. First apply the soft velcro piece to the backside of just one of the copies of numbers you just cut (so for instance, you should have three number 4's cut, just take one of these number 4's, flip it over, so you are looking at the number backwards- and from the backside, sew the velcro piece on). The picture below shows the number already sewn to the page (I took pictures after the page was finished), but at this point you are going to just be sewing the velcro onto just the number (not the muslin too).
 Sew the corresponding "prickly" piece of velcro to the number 4 piece
that will be applied to the muslin page- this time sewing on the velcro
to the right side of the number four. Be sure to sew the velcro onto
these pieces so it matches up to the velcro sewn onto the number pieces.
(Number 1 piece shown below- once again, this picture was taken after
the page was finished- at this point, you will just be sewing the velcro
to a single number (not 2 numbers sewn together).
Sew the corresponding "prickly" piece of velcro to the number 4 piece
that will be applied to the muslin page- this time sewing on the velcro
to the right side of the number four. Be sure to sew the velcro onto
these pieces so it matches up to the velcro sewn onto the number pieces.
(Number 1 piece shown below- once again, this picture was taken after
the page was finished- at this point, you will just be sewing the velcro
to a single number (not 2 numbers sewn together). One
thing to take note when applying the velcro and even cutting the velcro
rectangles, is you will eventually be trimming down these numbers just a
tad, so don't have the velcro go all the way out to the edges.
One
thing to take note when applying the velcro and even cutting the velcro
rectangles, is you will eventually be trimming down these numbers just a
tad, so don't have the velcro go all the way out to the edges. don't mind my messy stitching above :)
 Pick up the left over number copy (the one with the prickly velcro on
the right side), and and hold it up against the number piece you just
made and trim it down so it matches in size.
Pick up the left over number copy (the one with the prickly velcro on
the right side), and and hold it up against the number piece you just
made and trim it down so it matches in size.Next, place each "left-over" number copy on the muslin pages (I spread mine out over 2 pages), so you can get a feel for their placement on the page. On my page, the left page is numbers 1-6, and the right page is number 7-10 and then a pocket below those 7-10 numbers. You will also want to place the pocket pieces in place on the page before you sew the numbers on to make sure it all fits. Remember that you will be sewing the muslin page together to another muslin page in the end, so be sure to leave enough edge around the border.

Once things are in place, sew the single thickness numbers on the muslin page (don't sew the double thickness number pieces on- those will attach with velcro!) right side up, so the velcro shows. Then just velcro the numbers onto the page into place. Then sew on the pocket- mine is really simple. I just first sewed the pocket bottom on (just sewing around the left and right edges and bottom (leaving the top open), and then sewing on the pocket lid (placing the lid so it's lip goes over the pocket bottom slightly) by just stitching on the left and right side and top (not the bottom).
 There you have it- a numbers page. Get counting!
*Next up- Tie the shoe page, and then we're done!
Thursday, March 25, 2010
Page 21: Picnic basket/table setting
 This
is a page I came up with after wanting to do a buckle, and also wanting
to be able to teach my kids how to set the table correctly (this is
something I'm ashamed to admit, but as a mom I sometimes still do
wrong!). Other great buckle page ideas can be found here (from little handsbigwork.blogspot.com), and here (this is my little sister's book, scroll down to the super man buckle), and here (scroll down to the sixth picture down).
This
is a page I came up with after wanting to do a buckle, and also wanting
to be able to teach my kids how to set the table correctly (this is
something I'm ashamed to admit, but as a mom I sometimes still do
wrong!). Other great buckle page ideas can be found here (from little handsbigwork.blogspot.com), and here (this is my little sister's book, scroll down to the super man buckle), and here (scroll down to the sixth picture down).Here's my attempt at providing a template. It is all drawn to scale on a 8.5" x 11" sheet of paper, so if you are able to print it out at 100%, the sizes should be about right. The only thing not listed on the template is the napkin, which is pretty self explanitory- basically just a square folded up into a triangle.

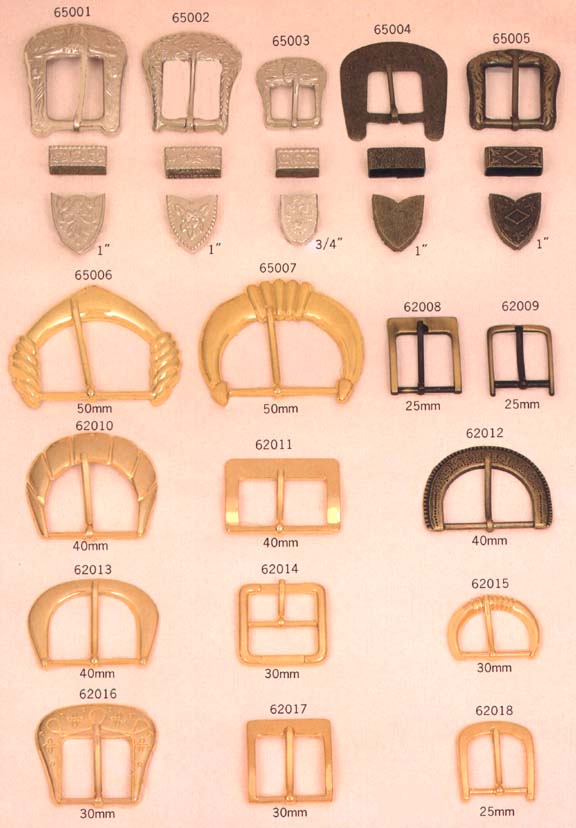
Items needed: One small buckle (I got mine at Joann's. They have a variety of shapes/sizes/in metal or plastic- look at all these fun buckles), about 8" x 12" rectangle of material for placemat and napkin (I picked a red gingham that would fray at the edges to give it a picnic feel), 6 small velcro pieces (I cut mine down from one large piece), brown felt for the basket, 5" x 5" square of white pellon for place settings, 5" x 5" square of white felt for backing on place settings, 4 eyelets, brown and/or white thread for sewing.
Teaches: buckling/unbuckling, how to set a table, imaginative play.
Cut out the following pieces: from you large rectangle of material, you are going to want to cut 2 pieces- one large 7.5" x 7.5" square for the napkin, and one large 7.5" x 4.25" rectangle for the placemat. Cut your velcro pieces down to size later (they'll need to match the corresponding place setting). Cut your brown felt into the following 6 picnic basket pieces: basket body (mine is about 5" wide, 3" tall, and sort of rounded on the edges), basket lid (cut it like a long oval that will cover the basket pocket- mine is 5" wide, 1.5" tall, basket handle (cut it so that it is a wide upside down U-shaped piece- mine is 4.5" wide, and 1" tall), eyelet strip (cut out a long rectangle strip- with one end cut evenly, and the other en cut to a point- my strip is .75" wide x 3.5" long), buckle strip (this is the piece that will attach/fold over onto to the buckle- mine is 1.75" wide x 3" long), belt loop (this is a small piece that folds around the buckle strip and is like a belt loop and will fold around your buckle strip and hold your eyelet strip into place when all buckled- mine is .5" tall x 2" wide). Cut out your 5 place settings: Plate, fork , spoon, knife, cup, from the white pellon (I first drew them out with a black sharpie on the white pellon before cutting, and arranged them on the place mat to make sure they fit properly), and cut out identical pieces from the white felt. To give you a general idea, my plate is about 2.75" wide in diameter, and my utensils are about 3" tall. I ended up trimming my place settings down after sewing them the double thickness, so at this point, while doing the initial cutting, you might want cut them out generously and leave some room on the borders beyond the black marker so your stitching won't get too close to the edge.
Directions: First, let's make those places settings (plate, fork, knife, spoon, glass).
 I used sharpie pens to draw out mine. I used an ultra fine black sharpie (permanent marker) for drawing the utensils and then used a colored blue sharpie
for coloring in the plate and water in the glass. Sharpies work great
on the pellon as they don't bleed. Before you sew the white pelon to
the white felt (to make the place settings double thickness), you are
going to want to sew on the velcro to the white felt half. I used the
soft/non sticky 1/2 of the velcro for this (so the placesettings
wouldn't stick to the inside of the picnic basket) and just cut out
small, thin pieces of velcro to match the specific place setting (see
picture).
I used sharpie pens to draw out mine. I used an ultra fine black sharpie (permanent marker) for drawing the utensils and then used a colored blue sharpie
for coloring in the plate and water in the glass. Sharpies work great
on the pellon as they don't bleed. Before you sew the white pelon to
the white felt (to make the place settings double thickness), you are
going to want to sew on the velcro to the white felt half. I used the
soft/non sticky 1/2 of the velcro for this (so the placesettings
wouldn't stick to the inside of the picnic basket) and just cut out
small, thin pieces of velcro to match the specific place setting (see
picture).  Sew
those into place onto the white felt pieces, and then sew the white
pellon (drawn on) pieces to the felt/velcro pieces. After sewing those
together to make them a double thickness, trim the edges so that they
lie close to the stitch.
Sew
those into place onto the white felt pieces, and then sew the white
pellon (drawn on) pieces to the felt/velcro pieces. After sewing those
together to make them a double thickness, trim the edges so that they
lie close to the stitch. Now,
for the napkin. This is pretty simple, just take your 7.5" x 7.5"
square and fold over the edges and iron, and then stitch to provide a
finished edge on all 4 edges. Then, I folded my napkin into a quarter
(so it was triangle shaped), and sewed on a piece of velcro to it, so
that it would stick to the place mat too. Because I applied the velcro
to the napkin after folding it, it makes it so that you can't open the
napkin completely, but it stays in a nice little triangle this way and
makes it easy to use when setting the table. After applying the velcro
to the napkin, I folded the napkin one more time and ironed/starched it
(so it became a smaller triangle and fits nicely on the place mat).
Now,
for the napkin. This is pretty simple, just take your 7.5" x 7.5"
square and fold over the edges and iron, and then stitch to provide a
finished edge on all 4 edges. Then, I folded my napkin into a quarter
(so it was triangle shaped), and sewed on a piece of velcro to it, so
that it would stick to the place mat too. Because I applied the velcro
to the napkin after folding it, it makes it so that you can't open the
napkin completely, but it stays in a nice little triangle this way and
makes it easy to use when setting the table. After applying the velcro
to the napkin, I folded the napkin one more time and ironed/starched it
(so it became a smaller triangle and fits nicely on the place mat). For
the placemat, take the 7.5" x 4.25" rectangle and on the top and bottom
edges of the rectangle, and fold them over and top stitch on top. I
wanted to leave my side edges unfinished (frayed) to give it a picnic
look, so I didn't fold those edges over, but rather frayed them and then
top stitched where the fray meets the material so the fraying would
stop. Then you are going to want to apply your other 1/2 of the velcro
pieces to the place mat. Play around with the place settings and
napkins and find out where they fit best. Then pin the velcro pieces
into place and sew them to the place mat material.
For
the placemat, take the 7.5" x 4.25" rectangle and on the top and bottom
edges of the rectangle, and fold them over and top stitch on top. I
wanted to leave my side edges unfinished (frayed) to give it a picnic
look, so I didn't fold those edges over, but rather frayed them and then
top stitched where the fray meets the material so the fraying would
stop. Then you are going to want to apply your other 1/2 of the velcro
pieces to the place mat. Play around with the place settings and
napkins and find out where they fit best. Then pin the velcro pieces
into place and sew them to the place mat material. Now
you are ready to sew the place mat to the quiet book page. My place
mat takes up the top half of the page. You may want to sort of position
your basket on the bottom half, to make sure everything will fit okay
(make sure to leave edges for the borders!). Once you've sewn the place
mat on, you are ready to start working on the picnic basket!
Now
you are ready to sew the place mat to the quiet book page. My place
mat takes up the top half of the page. You may want to sort of position
your basket on the bottom half, to make sure everything will fit okay
(make sure to leave edges for the borders!). Once you've sewn the place
mat on, you are ready to start working on the picnic basket!Now, to build this picnic basket! First thing you are going to want to do is place the brown cut felt pieces together at the bottom of the page to sort of build the basket. This will help you know where to position the first piece you are going to sew on- the basket body. Before you sew on the basket body to the muslin quiet book page, you are going to want to top stitch just the top edge of the basket body. Since you sew this on like a pocket, it is this top edge that will not be sewn onto the page and will be tugged on the most. Once you've top stitched that, lay the basket body onto the page, and sew down the sides and across the bottom so you make a pocket.
 Then
you are going to want to top stitch the bottom half of the wide ovaled
basket lid (since the top half will be sewn to the page it doesn't need
top stitching). Then place the basket lid over the basket body, so that
it's bottom rim comes down over the basket body about 1/3". Sew it
into place by just sewing the top half of it to the muslin quiet book
page. I for no particular reason (probably just ran out of one of the
colors or something), used 2 different colors of thread here. If you
look closely, you can see my white thread is the top stitching, and the
brown thread is where I sewed the pieces to the muslin quiet book page.
Then
you are going to want to top stitch the bottom half of the wide ovaled
basket lid (since the top half will be sewn to the page it doesn't need
top stitching). Then place the basket lid over the basket body, so that
it's bottom rim comes down over the basket body about 1/3". Sew it
into place by just sewing the top half of it to the muslin quiet book
page. I for no particular reason (probably just ran out of one of the
colors or something), used 2 different colors of thread here. If you
look closely, you can see my white thread is the top stitching, and the
brown thread is where I sewed the pieces to the muslin quiet book page. Next
you are going to want to sew your basket handle to the page. I just
placed it on top of the oval lid and stitched it twice back and forth
into place.
Next
you are going to want to sew your basket handle to the page. I just
placed it on top of the oval lid and stitched it twice back and forth
into place. Now
for the buckle. Take your eyelet strip piece of felt, and apply four
eyelets to it. On the pointed edge, I took a little bit of pellon (you
could use any sort of reinforcement material here) and sewed it to the
point so the point was sturdier (and would feed through the buckle
easier). Place the eyelet strip now so the straight (not pointed) edge
is in line with the top of the oval lid and sew that into place. I went
back and forth on the sewing machine here with this stitch so that it
was reinforced well to the felt/page since I knew it would get tugged
on.
Now
for the buckle. Take your eyelet strip piece of felt, and apply four
eyelets to it. On the pointed edge, I took a little bit of pellon (you
could use any sort of reinforcement material here) and sewed it to the
point so the point was sturdier (and would feed through the buckle
easier). Place the eyelet strip now so the straight (not pointed) edge
is in line with the top of the oval lid and sew that into place. I went
back and forth on the sewing machine here with this stitch so that it
was reinforced well to the felt/page since I knew it would get tugged
on.Next, you are going to want to apply your buckle to the buckle strip of felt. In order to do this, I had to loop the top edge over the buckle by making a small hole for the buckle tongue (the pin-like piece that feeds through the eyelets when the buckle is fastened) and then sewing the loop tightly into place around the base of the buckle so it becomes part of the buckle strip. I also reinforced my stitching here. Then you are going to want to take your belt loop, fold it into a ring shape and stitch it together, so it stays in a ring/loop. Slide this loop over the buckle strip you just built. Then sew the buckle strip onto the muslin quiet book page by placing it so that it's bottom edge (the edge without the buckle) lies flat with the bottom edge of the basket body. Before sewing this piece into place, you may have to play around withe buckle a bit and make sure it lines up well/attaches well with the eyelet strip that hangs down.
Lastly, if you want to put a text box on the page like mine, take some pellon and with permanent markers right something cute like "unpack the picnic basket and set the table", "set up a picnic!" or "a tisket a tasket, can you unbuckle my basket?"
Happy picnicking!
And up next is the "Numbers Page", so stay tuned! We're almost done with the 24 pages!!!
Subscribe to:
Posts (Atom)
Sew on a Button!
|
Thank you to...
my Mom's old red quiet book for the inspiration!
All the Pages at a Glance

Click on the Pic! As you can see there are a lot more instructions to come! I am slowly getting step by step instructions up on each page. I hope you find these useful! If you do find the instructions and links on this blog handy, will you be sure to link back to us here? Happy Quiet Book Making!
Showing posts with label quiet book. Show all posts
Friday, December 30, 2011
Oh, the talent!
So, I have this amazing sister-in-law named Becky. Not only is she funny, clever, tall and gorgeous- but that girl can craft!So, this post is all about showing off my favorite Becky!

The barn doors open, and the animals are printed on fabric with velcro backing

The monkey swings from branch to branch

The frog's tongue snaps to the flies

The alligator's mouth zips open

This fish has a magnet inside him

(I would post a cute pic of Becky and me here, but I haven't downloaded anything from the holidays yet, oops)
Here is her quiet book, totally puts mine to shame! Adorable and very sturdyThe barn doors open, and the animals are printed on fabric with velcro backing
The monkey swings from branch to branch
The frog's tongue snaps to the flies
The alligator's mouth zips open
This fish has a magnet inside him
Janette's Quiet Book

Are you in to trading and bartering? I made a sweet deal with my friend Janette. She is a photographer and we needed new family pictures. She wanted a quiet book for her little boy, but didn't know how to make one. Ta da - the trade! We got family pics for free, she got a custom quiet book for free.
The adorable chocolate colored tree fabric for the cover is from Joann's. I made the actual pages on felt, and then hammered in grommets to attach the rings. This way, if she wants to make more pages she can add them in, or if both kiddos want to play with a page.

Here is the classic Noah's Ark page with a zipper pocket. Simple.

I had a lot of fun making the fish page. The end of the fishing rod (shoelace) has velcro so it can "catch" a fish. The boat opens at the top so you can put your catch of the day there. The apples button on the tree and fit in the basket.

Every boy needs a road page! The red, yellow and green light pieces have velcro and the car parks in the garage.

The barn page is so fun with opening doors and animal finger puppets. Janette got married in the Idaho Falls temple, so this page is perfect. Each of the squares and Angel Moroni detach, so you can rebuild the temple. The little buttons open the door and inside is a piece of vinyl above the felt so Janette can put in a wedding picture.

I love this peek-a-boo page, it's one of my son's favorites. If you pull back the mittens I stitched on a piece of vinyl with an opening at the top so Janette can slip in a family picture. And of course, a little pocket for paper, pens and treats.
Quiet books are so much fun to make! If you haven't seen mine yet or want detailed patterns click here.




댓글 없음:
댓글 쓰기